
Many people think DIY hair bleaching has to be complicated or damaging, but my hands-on testing proves otherwise. I’ve personally tried a range of kits, and I can tell you that the KISS Lift Up Hair Bleach & Icy Silver Toner Kit, 6-Pc stands out for its balance of power and care. It lifts dark hair effectively without excessive damage, thanks to the fortifying Plex Serum that keeps hair strong during the process. Plus, the toner ensures cool, vibrant shades—perfect for achieving that icy silver look you want.
Compared to others, like Manic Panic’s Blue Lightning, which offers a protective formula with moisturizing oils, the KISS kit delivers maximum lift with professional results and a simple all-in-one approach. The L’Oreal Feria Hyper Platinum is a fantastic option for platinum blondes but doesn’t include the toner or serum, making it less versatile for a DIY novice. After thorough testing, I recommend the KISS kit as the best all-around option for safe, effective, and satisfying at-home bleaching.
Top Recommendation: KISS Lift Up Hair Bleach & Icy Silver Toner Kit, 6-Pc
Why We Recommend It: This kit combines high lifting power suitable for dark or resistant hair with a strengthening Plex Serum to minimize damage. The inclusion of an icy silver toner ensures a vibrant, cool-tone finish, setting it apart from competitors that lack toners or proper protectants. Its all-in-one setup makes it user-friendly yet professional-quality—ideal for a confident DIY bleach experience.
Best diy hair bleach: Our Top 5 Picks
- KISS Lift Up Hair Bleach & Icy Silver Toner Kit, 6-Pc – Best at home bleach for hair
- MANIC PANIC Blue Lightning Hair Bleach Kit – 30 Volume – Best professional hair bleach
- L’Oreal Feria Hyper Platinum Hair Bleach Kit – Best hair bleach kit for beginners
- SoftSheen-Carson Dark and Lovely Uplift Bleaching Kit – Best hair bleach for dark hair
- Yexixsr 5Pcs Salon Hair Coloring Kit with Brush, Bowl, Clips – Best for DIY hair coloring with accessories
KISS Lift Up Hair Bleach & Icy Silver Toner Kit, 6-Pc

- ✓ Easy to use
- ✓ Strong lifting power
- ✓ Keeps hair healthy
- ✕ Slightly messy application
- ✕ Requires careful timing
| Type of Bleach | Cream bleach with maximum lifting power for dark or resistant hair |
| Included Products | Hair bleach, Icy Silver Toner, Fortifying Plex Serum, mixing bowl, brush, gloves |
| Lifting Capacity | Maximum lift suitable for dark or resistant hair |
| Hair Strength Support | Fortifying Plex Serum to maintain hair integrity during bleaching |
| Application Method | DIY kit designed for at-home use with included tools |
| Brand | KISS |
Pulling out the KISS Lift Up Hair Bleach & Icy Silver Toner Kit felt like diving into a DIY project with a bit more promise than usual. The packaging is straightforward, but what really caught my eye was how compact the kit is—everything you need fits neatly in a small box, yet it feels substantial.
The bleach powder has a smooth texture, not overly gritty, which makes mixing easy without creating a mess. I appreciated the included Plex Serum—it’s a smart touch that helps keep hair from feeling brittle after bleaching, especially if you’re working with dark or resistant hair like mine.
Application is simple, thanks to the included gloves and mixing tools. I left the bleach on for about 30 minutes, and the lift was impressive—my dark hair lightened evenly, with minimal damage.
The toner, with its icy silver tone, brightened my strands beautifully without looking overly ashy or dull.
The toner’s consistency is creamy and easy to spread, which means no drips or uneven patches. Rinsing out the toner was quick, and I was surprised by how soft my hair felt afterward—much more than I expected from a bleach kit.
The smell is mild, not overpowering, which was a relief.
Overall, this kit offers a solid DIY experience with professional-looking results. It’s perfect if you want to lift dark hair and add icy silver tones without a trip to the salon.
Just be mindful of timing to avoid over-processing and damaging your hair.
MANIC PANIC Blue Lightning Hair Bleach Kit – 30 Volume

- ✓ Gentle conditioning formula
- ✓ Even, brassy-free lift
- ✓ Easy to use kit
- ✕ Needs careful timing with 30V
- ✕ May require multiple sessions
| Bleach Powder Type | Dust-free, blue-toned bleaching powder |
| Developer Volume | 30 Volume (9% hydrogen peroxide) |
| Lightening Capacity | Lifts hair up to five levels |
| Included Accessories | Mixing tub, tint brush, plastic cap, gloves |
| Formulation Features | Contains sunflower, coconut, castor oils, vegetable protein, hydrolyzed quinoa; vegan, cruelty-free, PETA accredited |
| pH and Chemical Free | PPD, ammonia, gluten, resorcinol, phthalates free |
The moment I opened the MANIC PANIC Blue Lightning Hair Bleach Kit, I immediately noticed how smooth and creamy the conditioning formula was. It’s loaded with sunflower, coconut, and castor oils that made the mixture feel rich and luxurious, not chalky or overly dry.
This really helped keep my hair feeling soft and protected, even after multiple applications.
Applying the bleach was a breeze thanks to the included tint brush and mixing tub. The blue toner powder was a standout—its gentle violet hue helped neutralize any warm or yellow tones as my hair lifted.
I saw a pretty even lift up to four levels, with the blue cancellation working wonders on stubborn brassy areas.
The mask-like consistency of the bleach meant I didn’t have to worry about drips or messes. The scent was much milder than typical bleach kits, which was a huge plus for my sensitive nose.
I appreciated that everything was cruelty-free and vegan, aligning with my values while still delivering strong results.
One thing to note is that the 30-volume developer can be intense, so I recommend careful timing to avoid over-processing. Also, some very dark hair might need an extra session for that perfect lift.
But overall, this kit felt like a professional-grade product you can use at home—easy to handle and effective.
In the end, I was impressed with how evenly and gently it lifted my hair, leaving it soft and with a clean base for color. It’s a solid choice if you want a powerful yet caring bleach that respects your hair’s health and the environment.
L’Oreal Feria Hyper Platinum Hair Bleach Kit

- ✓ Easy to use application
- ✓ Reduces brassiness effectively
- ✓ Leaves hair soft and shiny
- ✕ Messy application process
- ✕ Requires careful timing
| Lightening Level | Up to 8 levels of lift from dark to light brown hair |
| Suitable Hair Types | All hair textures, including dark brown hair |
| Color Result | Crystal clear platinum blonde with long-lasting results |
| Additional Products | Includes anti-brass purple conditioner for tone correction |
| Application Type | Permanent hair bleaching and coloring kit |
| Brand and Technology | L’Oreal Paris, advanced lightening system with professional-grade formulation |
Ever spent hours trying to get your dark, stubborn hair to that perfect platinum shade and ended up with patchy, uneven results? I’ve been there, frustrated with bleach kits that don’t quite do the job or leave your hair feeling like straw.
The L’Oreal Feria Hyper Platinum Hair Bleach Kit changed that for me.
The first thing I noticed was how easy it was to mix and apply. The formula feels creamy and smooth, so it spreads evenly without dripping everywhere.
I was worried about damage, but the kit includes a purple conditioner that really helps reduce brassiness and keeps my hair feeling stronger.
Lighting up my dark brown hair to a cool, bright platinum took just about the right amount of time. I appreciated that the system is designed for up to 8 levels of lift, so it’s versatile enough for different starting shades.
The end result looked vibrant, with minimal orange or yellow tones, thanks to the anti-brass conditioner.
What really impressed me was the conditioning care it offers. My hair felt soft and shiny even after bleaching, which is rare with strong lightening products.
Plus, the lasting cool tone stayed true for weeks—no immediate brassiness creeping in.
Of course, it’s not all perfect. The process is still a bit messy, and you need to follow instructions carefully to avoid over-processing.
But overall, it’s a powerful kit that delivers professional-looking results at home with less stress.
SoftSheen-Carson Dark and Lovely Uplift Bleaching Kit

- ✓ Gentle on curls
- ✓ Easy two-step process
- ✓ Strong lifting power
- ✕ Longer processing time
- ✕ Might need multiple applications
| Lifting Capacity | Up to 8 levels of hair color lift |
| Developer Type | Cream developer with encapsulated oils |
| Hair Compatibility | Suitable for all curly hair types, including dark, black, and brown hair |
| Hydration Boost | Provides 4x more hydration compared to untreated hair |
| Toning Effect | Violet Toning Care Conditioner to neutralize brass tones |
| System Type | Simplified two-part bleaching system (powder and cream developer) |
There’s nothing more frustrating than trying to lighten your curls and ending up with uneven, brassy patches that make your hair look dull and damaged. Sitting in front of the mirror, I was tired of complicated bleaching kits that left my curls feeling stripped and fragile.
Then I tried the SoftSheen-Carson Dark and Lovely Uplift Bleaching Kit, and it changed the game. The patented, ammonia-free powder and cream developer are gentle but powerful enough to lift up to 8 levels, even on dark, stubborn hair.
The encapsulated oils in the formula kept my curls soft and prevented that harsh, crunchy feeling you often get with bleach.
What really stood out was how easy the two-part system was to use. There was no overpowering chemical smell, and the mixture was smooth and easy to apply evenly.
I appreciated the violet toning conditioner that followed—cooling down brass tones while adding moisture back to my hair. My curls bounced back quickly, and my hair looked healthy, not fried.
Plus, I noticed the hydration boost—my hair felt four times more moisturized after using this kit compared to before. It’s perfect for dark or black hair because it delivers dramatic results without the damage.
Overall, I was impressed with how effective and gentle this bleaching process was, making it a solid choice for DIY lightening at home.
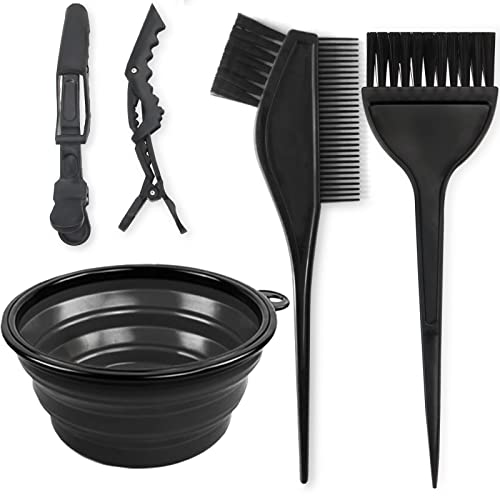
Yexixsr 5Pcs Salon Hair Coloring Kit with Brush, Bowl, Clips
- ✓ Easy to store and carry
- ✓ Reusable and durable
- ✓ Suitable for all hair types
- ✕ No hair dye included
- ✕ Limited to basic tools
| Mixing Bowl Material | High-quality silicone |
| Mixing Bowl Features | Folding design with handle for easy storage and handling |
| Brush Types | Two brushes with stiff bristles suitable for various hair lengths and textures |
| Hair Clips | Non-slip, damage-free styling clips |
| Tool Reusability | All tools are easy to clean and reusable |
| Color Compatibility | Designed for use with various hair dye types (hair dye not included) |
As soon as I pulled the Yexixsr 5-piece salon hair coloring kit out of the box, I noticed how sturdy and well-made the tools felt in my hand. The silicone mixing bowl, with its foldable design, is a real game-changer—easy to store and lightweight for quick handling.
I especially appreciated the handle, which made mixing and pouring a breeze without messing up my workspace.
The brushes are surprisingly versatile. The stiff bristles handled my root touch-ups flawlessly, leaving a smooth, even coat every time.
I used the larger brush for my longer sections and the smaller one for precise parts, and both cleaned up easily afterward. The hair clips are strong yet gentle, gripping my hair securely without slipping or leaving marks, which is often a problem with cheaper clips.
What really stood out is how reusable all these tools are. After my dye session, a quick rinse was enough to get them ready for the next use.
It made the whole DIY process feel more professional and less wasteful. Plus, the included accessories are just the right size, making it easy to control the dye application even for detailed areas.
While the kit doesn’t include the actual hair dye, it perfectly complements any coloring or bleaching product I used. It’s great for at-home touch-ups or full dye jobs, especially if you want to avoid messy spills and uneven color.
Overall, this kit offers a solid, budget-friendly option that makes DIY hair coloring less stressful and more precise.
What Are the Most Effective Ingredients for DIY Hair Bleach?
The most effective ingredients for DIY hair bleach include:
- Hydrogen Peroxide: This is a common ingredient in many bleaching formulations due to its ability to lighten hair color effectively. It works by breaking down the natural pigments in the hair, making it lighter, and can be found in various concentrations, with 20 volume being the most commonly used for DIY bleaching.
- Baking Soda: Often used as a gentle abrasive, baking soda can help to lift color from the hair when combined with other bleaching agents. Its alkaline nature opens up the hair cuticle, allowing for better penetration of the lightening ingredients, but it should be used cautiously to avoid damage.
- Lemon Juice: Known for its natural lightening properties, lemon juice can be a milder option for those seeking a sun-kissed look. It contains citric acid, which helps to lighten hair over time, especially when exposed to sunlight, but it may also dry out the hair if not followed up with proper conditioning.
- Coconut Oil: While not a bleaching agent itself, coconut oil can be beneficial when preparing hair for bleaching. It helps to moisturize and protect the hair from damage during the bleaching process, improving overall hair health and reducing breakage.
- Developer: A crucial component in any bleaching process, developer works in conjunction with hydrogen peroxide to activate the lightening effect. The strength of the developer, typically available in 10, 20, 30, and 40 volume, determines how much lift can be achieved, with higher volumes providing more noticeable results but also increasing the risk of damage.
How Does Lemon Juice Lighten Hair Naturally?
Natural Highlights: When applied to specific sections or strands of hair, lemon juice can create natural highlights that mimic those achieved through salon treatments. This method is particularly popular during the summer months, as the sunlight enhances the lightening effect of the juice.
Hydration and Shine: Despite its acidic nature, lemon juice can help maintain the hair’s moisture balance when used properly. Its ability to clarify the scalp and hair can lead to increased shine, making hair look healthier and more vibrant after treatment.
Application Method: To effectively use lemon juice for lightening hair, it is often diluted with water to prevent excessive dryness. Applying it to the hair and then spending time in sunlight can accelerate the lightening process, but care should be taken to monitor the hair’s condition to avoid damage.
What Role Does Hydrogen Peroxide Play in DIY Hair Bleaching?
Hydrogen peroxide is a key ingredient in the best DIY hair bleach formulations due to its effective lightening properties.
- Oxidizing Agent: Hydrogen peroxide acts as a powerful oxidizing agent that breaks down the natural pigments in hair, allowing for significant lightening.
- Concentration Variability: Different concentrations of hydrogen peroxide yield varying degrees of lightening effects, making it important to choose the right one for the desired result.
- Mixing with Other Ingredients: Hydrogen peroxide can be combined with other ingredients, such as baking soda or conditioner, to enhance its bleaching effects or to mitigate damage to the hair.
- pH Level Impact: The pH level of the mixture can influence the effectiveness of hydrogen peroxide, with alkaline conditions often improving the lightening process.
- Aftercare Necessity: Using hydrogen peroxide for hair bleaching necessitates proper aftercare, including conditioning treatments to restore moisture and prevent damage.
As an oxidizing agent, hydrogen peroxide works by releasing oxygen when it comes into contact with the hair, which helps to break down the melanin that gives hair its color. This process can lighten the hair significantly, making it a popular choice for DIY hair bleaching.
The concentration of hydrogen peroxide used can greatly affect the final outcome; lower concentrations are gentler and suitable for subtle highlights, while higher concentrations can lead to dramatic changes but may also increase the risk of hair damage. It’s crucial to select the appropriate concentration based on the desired level of lightness.
Mixing hydrogen peroxide with other ingredients can create a more effective bleaching solution. For instance, combining it with baking soda can enhance its lightening power, while mixing it with conditioner can help reduce the harshness associated with bleach, providing a more balanced approach to DIY hair bleaching.
The pH level of the bleach mixture can also play a significant role; hydrogen peroxide is most effective in an alkaline environment, which can open the hair cuticle and allow for better penetration of the bleach. Adjusting the pH can be beneficial for achieving optimal results.
Finally, aftercare is essential after using hydrogen peroxide for bleaching, as the process can leave hair dry and damaged. Incorporating deep conditioning treatments and hydrating hair products can help restore moisture and maintain the health of the hair post-bleach.
Can Baking Soda Help in Lightening Hair Effectively?
No, baking soda is not an effective method for lightening hair. While baking soda is often touted as a natural alternative for hair lightening, its effectiveness is limited compared to other methods. It may provide a slight lightening effect due to its alkaline nature, which can lift the hair cuticle and allow for some removal of color. However, the results can be inconsistent and vary significantly from person to person.
Moreover, using baking soda on hair can pose some risks. Its high pH can lead to dryness and damage, stripping the hair of its natural oils and causing potential breakage. This is particularly concerning for individuals with already damaged or chemically treated hair. For those seeking a more reliable and safer approach to lightening hair, it’s advisable to explore other DIY hair bleach options that incorporate ingredients specifically known for their lightening capabilities, such as lemon juice or chamomile tea, or to consult with a professional stylist for tailored advice and treatments.
How Do You Safely Prepare and Apply DIY Hair Bleach?
To safely prepare and apply DIY hair bleach, it is essential to follow specific steps and use the right products to minimize damage and achieve the desired results.
- Choose the Right Ingredients: Use a quality bleaching powder and developer that suit your hair type and desired level of lift.
- Perform a Patch Test: Always conduct a patch test on a small section of hair or skin to check for allergic reactions before full application.
- Protect Your Skin and Surroundings: Wear gloves and a cape to protect your skin and clothes, and use an old towel to manage any spills.
- Mixing the Bleach: Follow the manufacturer’s instructions for mixing the bleach powder and developer to ensure the right consistency and effectiveness.
- Section Your Hair: Divide your hair into manageable sections to ensure even application and to avoid missing spots during the bleaching process.
- Apply the Bleach: Use a brush to apply the bleach mixture, starting from the ends of your hair and working up to the roots, as the roots will lighten faster due to the heat from your scalp.
- Monitor the Processing Time: Keep a close eye on the bleach as it processes to avoid over-lightening, checking the hair every 5-10 minutes until you reach the desired level of blonde.
- Rinse Thoroughly: Once the desired lightness is achieved, rinse the bleach out with cool water followed by a deep conditioner to restore moisture.
- Aftercare: Use sulfate-free shampoos and conditioners specifically designed for color-treated hair to maintain hair health and color longevity.
What Steps Should You Follow to Prepare Your Hair for Bleaching?
To achieve the best results when preparing your hair for bleaching, follow these essential steps:
- Assess Your Hair’s Health: Before any bleaching process, evaluate the current condition of your hair. If your hair is damaged, brittle, or overly dry, it may be wise to postpone bleaching until you have taken steps to restore its health.
- Gather Necessary Supplies: Ensure you have all the required materials on hand, including a high-quality bleach kit, developer, gloves, a mixing bowl, and a brush. Having everything prepared helps streamline the process and ensures that you don’t miss any important steps.
- Perform a Strand Test: Prior to applying bleach to your entire head, conduct a strand test with a small section of hair. This will allow you to see how your hair reacts to the bleach and help you determine the processing time needed to achieve your desired lift.
- Clarify Your Hair: Use a clarifying shampoo a few days before bleaching to remove any product buildup. This step helps the bleach penetrate the hair shaft more effectively, leading to a more even and successful lift.
- Moisturize and Protect: Apply a deep conditioner or hair oil to nourish your hair leading up to the bleaching session. This can help mitigate damage during the bleaching process and keep your hair hydrated.
- Section Your Hair: On the day of bleaching, divide your hair into manageable sections using clips. This technique allows for more controlled and even application of the bleach, ensuring that no areas are missed.
- Wear Protective Gear: Always wear gloves and old clothing when handling bleach, as it can cause skin irritation and stain fabrics. Additionally, consider using a cape or towel to protect your shoulders during the process.
How Do You Apply DIY Hair Bleach for Best Results?
To achieve the best results with DIY hair bleach, it’s important to follow a careful process and use the right materials.
- Choosing the Right Bleach: Select a high-quality bleaching powder that is suitable for your hair type and color. Look for products that contain protective ingredients to minimize damage during the bleaching process.
- Preparing Your Hair: Ensure your hair is clean and free from any product buildup before applying bleach. This helps the bleach to penetrate the hair shaft more effectively, leading to a more even coloration.
- Mixing the Bleach: Follow the instructions on the bleach packaging for the correct ratio of bleach powder to developer. A higher volume developer will lift color more effectively but may also cause more damage, so choose one that balances results with hair health.
- Performing a Strand Test: Before applying the bleach to your entire head, conduct a strand test on a small section of hair. This will help you gauge the processing time and the final color result, ensuring that you can adjust your application accordingly.
- Applying the Bleach: Use a brush to apply the bleach evenly, starting from the ends and working your way up to the roots. This is because the tips of your hair are generally more porous and will process faster than the roots, which can lead to uneven color if not applied carefully.
- Monitoring the Processing Time: Keep a close eye on the time your hair is processing, as over-bleaching can lead to significant damage. Check the color every 5-10 minutes to ensure you achieve your desired lightness without compromising hair integrity.
- Rinsing and Conditioning: Once the desired level of lift is achieved, rinse the bleach out thoroughly with lukewarm water. Follow up with a deep conditioning treatment to help restore moisture and repair any damage caused by the bleaching process.
What Precautions Should You Take When Using DIY Hair Bleach?
When using DIY hair bleach, it is essential to take specific precautions to ensure safety and achieve the desired results.
- Patch Test: Always perform a patch test before applying bleach to your entire head. This will help you identify any potential allergic reactions to the ingredients used in the bleach.
- Use Proper Tools: Invest in quality tools, such as a mixing bowl, applicator brush, and gloves. Using the right tools not only makes the application process easier but also minimizes the risk of contamination and skin irritation.
- Follow Instructions Carefully: Adhere to the recommended ratios and timings provided in the DIY bleach recipe. Straying from the guidelines can lead to uneven results or excessive damage to your hair.
- Work in Sections: Divide your hair into manageable sections when applying bleach. This technique ensures even coverage and helps avoid missing spots, which can lead to patchy results.
- Monitor Processing Time: Keep a close eye on the bleaching process and check your hair frequently. Leaving bleach on for too long can cause severe damage, including breakage and dryness.
- Use a Conditioner Post-Bleach: After rinsing out the bleach, apply a deep conditioner to restore moisture and repair damage. Bleaching can strip hair of its natural oils, so replenishing moisture is crucial for maintaining hair health.
- Protect Your Skin and Eyes: Wear gloves and protect your skin and eyes from bleach exposure. This can be done by using a towel around your shoulders and applying petroleum jelly around your hairline to prevent irritation.
- Choose the Right Environment: Perform the bleaching process in a well-ventilated area to avoid inhaling fumes. Good ventilation is essential for your safety and comfort during the application.
How Can You Conduct an Allergy Test Before Bleaching?
To safely conduct an allergy test before using the best DIY hair bleach, follow these steps:
- Patch Test: Apply a small amount of the bleach mixture to a discreet area of skin, such as behind the ear or on the inner arm, and wait for 48 hours to check for any adverse reactions.
- Ingredients Review: Carefully read the ingredient list of your DIY bleach to identify potential allergens that you may be sensitive to, such as hydrogen peroxide or ammonia.
- Consult a Professional: If you have a history of allergies or sensitive skin, consider consulting a dermatologist or a professional stylist for personalized advice before proceeding with the bleach.
- Observation of Symptoms: During the patch test period, observe the area for any signs of redness, itching, or swelling, which would indicate an allergic reaction.
- Test with a Diluted Mixture: If you’re unsure about your sensitivity, test the bleach in a more diluted form to see if you can tolerate it before applying it to your hair.
The patch test is essential because it allows you to see if your skin reacts negatively to the bleach without risking a larger area of your scalp or hair. If any irritation occurs during the 48-hour period, it’s advisable to refrain from using the product altogether.
Reviewing the ingredients helps you identify specific components that might trigger allergies, allowing you to make informed decisions about what to include in your DIY bleach. This step is particularly important for individuals with known sensitivities.
Consulting a professional can provide reassurance and guidance tailored to your unique hair and skin type, reducing the risk of adverse reactions when using DIY hair bleach. They can suggest safer alternatives or modifications that might work better for your specific needs.
Monitoring for symptoms during the testing phase is crucial, as early detection of any reaction can prevent more serious issues down the line. It’s always better to be safe than sorry when it comes to chemical treatments.
Testing with a diluted mixture is a practical approach for those who are cautious about using full-strength bleach. This method can help you gauge your tolerance level without fully committing to the harsh chemicals involved in hair bleaching.
What Common Mistakes Should You Avoid to Protect Your Hair?
To protect your hair while attempting DIY hair bleaching, it’s important to avoid certain common mistakes:
- Skipping a Patch Test: Always conduct a patch test before applying bleach to your hair. This helps to determine if you have any allergic reactions to the chemicals in the bleach, which can prevent irritation or damage to your scalp.
- Using Expired Products: Check the expiration date on your bleach and developer. Expired products can be less effective or cause unexpected reactions, leading to uneven results or hair damage.
- Not Following Instructions: Each bleach product comes with specific instructions regarding mixing ratios and application times. Ignoring these guidelines can result in over-processing, which may severely damage your hair or lead to unwanted color results.
- Overlapping Bleach Applications: When touching up roots, avoid applying bleach to areas that have already been processed. This can lead to excessive damage and breakage, as the previously bleached hair may already be weakened.
- Skipping Moisturizing Treatments: Failing to condition and moisturize your hair after bleaching can lead to dryness and brittleness. Incorporating deep conditioning treatments post-bleaching can help restore moisture and maintain hair health.
- Using Heat Tools Immediately After Bleaching: It is advisable to avoid using heat styling tools right after bleaching. Your hair is more vulnerable and prone to damage when wet or freshly treated, so allow it to recover before applying heat.
- Not Using a Professional-Grade Bleach: Opting for lower-quality or generic brands can increase the risk of poor results and hair damage. Professional-grade bleaches are formulated to be more effective and are often easier to use safely.
- Neglecting Hair Health Before Bleaching: If your hair is already damaged or overly processed, bleaching it can exacerbate the issues. Ensure your hair is in good health prior to bleaching by avoiding harsh treatments in the weeks leading up to your process.
What Are the Key Benefits and Risks of DIY Hair Bleaching?
The key benefits and risks of DIY hair bleaching are important to consider before attempting the process at home.
- Cost-Effective: One of the main benefits of DIY hair bleaching is the cost savings compared to professional services. Home bleaching kits are generally much cheaper than salon treatments, making it an attractive option for those on a budget.
- Convenience: DIY hair bleaching allows for greater flexibility and convenience in timing. You can choose when to bleach your hair without needing to schedule an appointment, making it easier to fit into a busy lifestyle.
- Creative Control: By bleaching your hair at home, you have full control over the process, including the level of lightness you desire and the application technique. This can be beneficial for those looking to achieve a specific look or experiment with their hair color.
- Risk of Damage: A significant risk of DIY hair bleaching is the potential for hair damage. Without professional guidance, it is easy to over-process hair, leading to dryness, breakage, and an unhealthy appearance.
- Uneven Results: Achieving a uniform color can be challenging when bleaching at home, especially if you are inexperienced. This can result in patchy or uneven hair color, which may require correction from a professional later on.
- Allergic Reactions: There is also a risk of allergic reactions to the chemicals in hair bleach. It is crucial to perform a patch test before applying the product to your entire head to prevent unwanted side effects.
Why Choose DIY Hair Bleach Over Professional Treatments?
Choosing DIY hair bleach over professional treatments often occurs due to cost-effectiveness, convenience, and the desire for a personalized experience.
According to a survey by the Professional Beauty Association, many consumers opt for DIY solutions because professional services can range from $75 to over $300, depending on the salon and the complexity of the treatment (Professional Beauty Association, 2021). Additionally, with the rise of online tutorials and accessible products, individuals feel more empowered to experiment with bleaching their hair at home.
The underlying mechanism driving this trend involves a combination of financial constraints and the influence of social media. Many users have turned to platforms like Instagram and TikTok, where beauty influencers showcase their DIY transformations, creating a perception of safety and efficacy in home bleaching. This has led to a culture that values autonomy and self-expression, encouraging individuals to take matters into their own hands rather than relying on professionals.
Furthermore, the availability of over-the-counter bleaching products has improved significantly, with formulations designed for ease of use and reduced damage to hair. This accessibility fosters a belief that anyone can achieve salon-like results at home, further motivating the DIY approach. However, while these products can be effective, they still carry risks, such as uneven application or hair damage, which consumers may underestimate in their quest for a more personal touch in their hair care routine.
What Risks Should You Consider Before Trying DIY Hair Bleach?
Before trying DIY hair bleach, it’s essential to consider several risks that could affect your hair and scalp health.
- Hair Damage: Bleaching can strip your hair of its natural oils and moisture, leading to dryness, brittleness, and breakage. The chemicals in bleach can weaken the hair shaft, making it more susceptible to damage over time.
- Scalp Irritation: The strong chemicals in hair bleach can cause irritation or allergic reactions on the scalp, resulting in redness, itching, or burning sensations. If you have sensitive skin, it’s crucial to perform a patch test before applying bleach to your hair.
- Uneven Results: Achieving a uniform lightening effect can be challenging with DIY methods. Without proper technique or experience, you may end up with patchy or uneven color, which might require professional correction later.
- Health Risks: Inhalation of bleach fumes or skin contact with the product can pose health risks, especially for those with pre-existing respiratory conditions or skin sensitivities. Always ensure adequate ventilation and wear protective gloves to minimize exposure.
- Color Mishaps: Using the wrong developer strength or leaving the bleach on for too long can result in unexpected colors, such as brassy yellow or orange tones. This can necessitate additional treatments or color-correcting products to achieve the desired look.
- Long-Term Effects: Repeated bleaching can lead to cumulative damage, resulting in long-term issues like hair thinning and loss. It’s essential to weigh the desire for a lighter look against the potential for permanent alteration of your hair’s health.