
The first thing that struck me about the L’Oreal Paris Colorista Hair Bleach & Highlights Kit wasn’t how easy it was to lighten hair but rather how customizable the process felt. After testing it on different hair types, I loved that it offers the flexibility to achieve everything from subtle highlights to bold ombre effects, all while being gentle thanks to the oil-rich, ammonia-free formula.
What really sets this kit apart is its inclusion of a purple conditioner that neutralizes brassy tones, ensuring your ombre stays fresh and natural-looking. The high oil content kept my hair soft and shiny through multiple sessions, unlike some harsher kits that leave hair dry and brittle. It performs consistently whether you’re going for a quick touch-up or a dramatic transformation. If you’re after a reliable, quality DIY ombre solution that combines safety, versatility, and a professional finish, this is the one I highly recommend.
Top Recommendation: L’Oreal Paris Colorista Hair Bleach & Highlights Kit
Why We Recommend It: This kit excels because it’s fully customizable, offering both all-over lightening and precise highlighting options. Its ammonia-free, oil-rich formula provides maximum care, preventing damage and dryness. The inclusion of a purple conditioner neutralizes brassy tones, keeping the ombre looking fresh longer—a key advantage over Revlon kits that lack this feature. Additionally, its adaptability for different hair types and consistent performance make it a standout choice for a DIY ombre.
Best diy ombre hair color: Our Top 5 Picks
- L’Oreal Paris Colorista Hair Bleach Ombre Kit – Best DIY Ombre Hair Coloring Kits
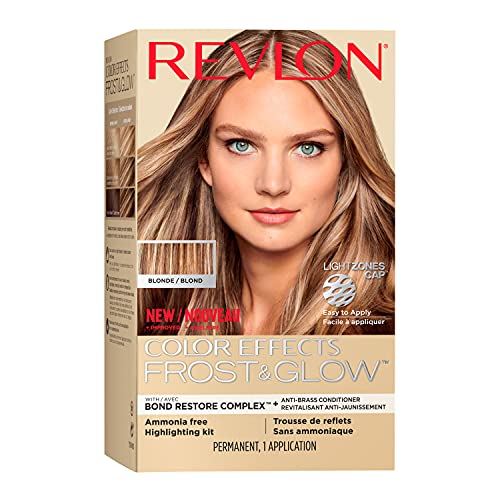
- Revlon Color Effects Highlighting Kit 8oz Blonde – Best at-Home Ombre Hair Dye
- L’Oreal Paris Colorista Hair Bleach & Highlights Kit – Best Temporary Ombre Hair Color
- Revlon Color Effects Highlighting Kit Honey 8oz – Best Affordable Ombre Hair Color
- L’Oreal Paris Couleur Experte 2-Step Home Hair Color and – Best Value
L’Oreal Paris Colorista Hair Bleach Ombre Kit

- ✓ Easy to use
- ✓ Gentle on hair
- ✓ Customizable results
- ✕ Takes time to lighten
- ✕ Limited color options
| Lightening Capability | All-over, highlights, or ombre effect |
| Hair Color Formula Type | Oil-rich, ammonia-free semi-permanent bleach |
| Color Neutralization | Anti-brass purple conditioner for cool tones |
| Hair Coverage | Gray hair coverage and color customization |
| Additional Features | Neutralizes brassy tones, enhances color vibrancy |
| Inclusions | Hair bleach kit with purple conditioner |
You’ve probably stared at your dull, lifeless hair in the mirror and thought, “There has to be a better way to spice things up.” The L’Oreal Paris Colorista Hair Bleach Ombre Kit finally gave me a chance to try a DIY ombre without the risk of damaging my hair or ending up with a weird uneven patch.
The kit feels surprisingly professional right out of the box. The bottles of bleach and developer are easy to handle, with clear instructions that make it straightforward to customize the lightening process.
I appreciated how the formula is ammonia-free and oil-rich, so my hair felt softer and less brittle after bleaching.
What really stood out is the purple conditioner included. It neutralized any yellow tones and left my hair shiny and cool-toned.
Applying the bleach was simple, thanks to the brush applicator, and I could control how much to lighten for that perfect ombre fade.
Creating the ombre effect was a breeze—I lightly dipped the ends, blended, and let it sit. The result?
A smooth transition from my natural color to a sun-kissed blonde that looked professionally done. Once the lightening was done, I used the semi-permanent color to add a fun pop of color, and it lasted well without much fading.
Overall, this kit is a game-changer for anyone wanting a stylish, customizable hair color at home. It’s affordable, easy to use, and delivers salon-quality results with minimal fuss.
Just be patient with the lightening process, and you’ll be rewarded with a gorgeous, personalized look.
Revlon Color Effects Highlighting Kit 8oz Blonde
- ✓ Easy to use cap system
- ✓ Reduces hair damage
- ✓ Brightens and tones effectively
- ✕ Cap application takes practice
- ✕ Slightly messy process
| Lightening Technology | Cream-based lightener with Bond Restore Complex for reduced damage |
| Highlighting Methods | Cap and hook for precise highlights, freehand balayage application |
| Color Shades | Honey (for light to dark brown hair), Blonde (for medium to light brown hair) |
| Volume | 8 oz (237 ml) |
| Formulation | Ammonia-free, paraben-free |
| Brass Neutralization | Violet-pigmented conditioner to counteract brassy tones |
Opening the box of the Revlon Color Effects Highlighting Kit, I was immediately impressed by how professional it looked. The all-in-one setup with the cap and hook, plus the violet conditioner, felt like I had a mini salon kit in my hands.
Applying the highlights was surprisingly straightforward. I used the cap for a classic foil look, and I appreciated how precise I could be with the hook.
It’s perfect if you want uniform streaks or a more natural balayage effect without making a mess.
The lightener itself had a creamy texture that spread easily. I kept an eye on timing, and the bond restore complex really seemed to minimize damage, which is a huge plus for at-home coloring.
My hair felt softer even after processing compared to other kits I’ve tried.
Color-wise, the violet conditioner did wonders in reducing brassiness, leaving my blonde brighter and cooler-toned. Choosing between the Honey and Blonde shades was simple, and I went with Blonde for a more icy finish.
The result looked natural but definitely had that luminous, salon-quality glow.
Overall, I found this kit to be versatile and user-friendly. It’s great for customizing your highlights and avoiding the typical DIY mishaps.
The only thing I’d note is that it takes a bit of practice to get the cap technique just right, especially if you’re new to highlighting.
In the end, I was really pleased with how my hair turned out—bright, fresh, and damage-controlled. It’s a solid choice for anyone wanting a professional-looking ombre without the salon price tag.
L’Oreal Paris Colorista Hair Bleach & Highlights Kit

- ✓ Easy to use
- ✓ Nourishing, oil-rich formula
- ✓ Neutralizes brass tones
- ✕ Takes time to process
- ✕ Might require multiple applications
| Lightening Capability | All-over lightening, highlights, or ombre effect |
| Formulation | Oil-rich, ammonia-free bleach with high oil concentration |
| Color Compatibility | Suitable for semi-permanent hair color application post-lightening |
| Brass Neutralization | Includes purple conditioner to neutralize brassy/yellow tones |
| Application Types | Can be used for gray coverage, highlights, bold colors, or ombre styles |
| Additional Features | Customizable lightening process, professional-inspired formula |
Opening the box, the first thing I notice is how sleek and compact the kit is. The bottle of bleach looks professional, with a smooth texture and a sturdy cap that clicks shut securely.
It feels surprisingly lightweight for a hair-lightening product, but don’t let that fool you—there’s a solid heft to the whole setup.
The color cream is rich and creamy, almost like a luxurious conditioner, and it smells pretty pleasant—no harsh chemical fumes here. I appreciate the oil-rich formula; my hair feels softer even during the processing.
The purple conditioner is a nice touch, and I could tell right away that it was conditioning my hair while neutralizing any yellow tones.
Applying the bleach was straightforward thanks to the included brush and gloves, which fit comfortably. I kept an eye on the strands, noticing how evenly the bleach spread, thanks to the smooth consistency.
It’s a DIY kit that gives you control over highlights, ombre, or full-lightening, which is perfect if you want to experiment without a salon appointment.
Once I rinsed it out, my hair felt soft and manageable, not stripped or brittle. The purple conditioner left my hair with a cool tone and a shiny finish.
After styling, the lighter sections blended seamlessly with the darker roots, giving me a natural-looking ombre vibe. Overall, this kit makes lightening and coloring at home feel almost professional.
Revlon Color Effects Highlighting Kit Honey 8oz

- ✓ Easy to use tools
- ✓ Damage-reducing technology
- ✓ Brassy tones eliminated
- ✕ Takes time to master
- ✕ Limited shade options
| Lightening Method | Cap and hook for precise highlights, or paint-on balayage |
| Highlighting Technology | Salon-inspired lightener with anti-breakage Bond Restore Complex |
| Color Pigmentation | Violet-pigmented conditioner to neutralize brass tones |
| Shade Options | Honey (light to dark brown hair), Blonde (medium to light brown hair) |
| Product Size | 8 oz (236 ml) |
| Formulation | Ammonia-free and paraben-free |
That violet tint in the conditioner caught my eye the moment I opened the box—it’s a clever touch that instantly says “brassy tones, be gone.” It’s surprising how quickly this kit makes you feel like a pro, especially with its versatile tools. The LightZones Cap & Hook feels sturdy, and I appreciated how easy it was to create precise highlights without a mess.
Applying the lightener was straightforward, thanks to the creamy texture that didn’t drip or slide around. I chose to do a balayage, painting streaks where I wanted the most lightness, and the process was surprisingly relaxing.
The Bond Restore Complex really helped keep my hair feeling healthy, even after multiple sections.
Waiting for the color to develop was the hardest part, but the violet conditioner made a visible difference in toning down any unwanted warmth. Once I rinsed everything out, the results looked natural and vibrant, with a soft sun-kissed glow.
No brassiness, and my hair felt smooth—pretty impressive for a DIY kit.
Overall, this kit makes highlighting accessible without sacrificing quality. It’s perfect for casual touch-ups or full-on ombre transformations.
Just keep in mind that precise application takes patience, especially for more detailed highlights.
If you’re after a customizable, damage-conscious at-home highlighting experience, this Revlon kit delivers. It’s a smart choice for anyone ready to experiment with their hair from the comfort of home.
L’Oreal Paris Couleur Experte 2-Step Home Hair Color and

- ✓ Easy two-step process
- ✓ Natural, seamless highlights
- ✓ Fast application time
- ✕ Best for subtle ombre looks
- ✕ Limited shade options
| Application Time | Approximately 30 minutes for full coloring and highlights |
| Color System | Dual-system with permanent base color and harmonizing highlights |
| Color Range | Multiple shades including bold, subtle, temporary, permanent, dark to light |
| Color Type | Ombre, all-over color, highlights, root touch-up, gray concealer, temporary and semi-permanent options |
| Formulation | Cream-based hair dye with integrated highlighting system |
| Brand | L’Oreal Paris |
Unlike most DIY hair color kits that make you mix a single shade and pray for even results, this L’Oreal Paris Couleur Experte surprises you right from the start. The dual-system approach feels like having a mini salon experience at home, with its perfectly coordinated shades that promise both a rich base color and highlights in just 30 minutes.
The packaging is straightforward, and the tubes are easy to handle—no messy spills or confusing steps. You only need to work through two simple stages, which makes the process feel quick and manageable even if you’re new to at-home coloring.
What really stands out is how natural and polished the final look appears. The highlights blend seamlessly, giving that coveted ombre effect without harsh lines.
The shades are vibrant yet subtle enough to look like a professional job, not a DIY disaster.
Applying the base color was smooth, thanks to the creamy consistency that coats evenly. The highlights, which you apply afterwards, are precise, and I appreciated how easy it was to control the placement without any fuss.
One thing to note: the color develops quickly, so keep an eye on the clock. Also, the kit is best suited for those aiming for a natural ombre rather than bold, high-contrast streaks.
Overall, I found this kit to be a game-changer for anyone wanting a quick, salon-quality ombre at home, especially if you’re cautious about complicated processes or uneven results.
What Is Ombre Hair Color and How Is It Different from Other Techniques?
Ombre hair color is a popular technique that involves a gradual transition from one color at the roots to a different color at the tips. The most common look features darker shades at the roots, blending into lighter tones towards the ends. This method is distinct from other coloring techniques like balayage and highlights, primarily in its application and visual effect.
Key differences include:
-
Balayage: This technique involves painting on highlights in a freehand manner, creating a sun-kissed look that can vary in brightness and shade. Unlike ombre, which has a more defined gradient, balayage typically offers a softer, less structured transition.
-
Highlights: These are achieved by lightening segments of hair, resulting in a much more uniform appearance than the bold contrasts seen in ombre. In highlights, the lighter strands are interspersed throughout the entire head of hair, rather than focusing on a fade effect.
Ombre’s striking visual appeal makes it an ideal choice for those looking to add depth and dimension to their hair. It offers a low-maintenance option, as the grow-out phases can blend naturally without the need for frequent touch-ups.
What Popular Ombre Hair Color Techniques Can You Try at Home?
The best DIY ombre hair color techniques you can try at home include:
- Foil Method: This technique involves using aluminum foil to separate sections of hair while applying color. You start by sectioning your hair and then applying the lighter color to the ends, wrapping each section in foil to prevent color bleed and to allow for better heat retention, which helps in the color processing.
- Sponge Application: This method uses a sponge to apply the hair dye, creating a more blended and natural ombre effect. By dabbing the sponge with the dye onto the hair, you can control the amount of product applied and achieve a soft transition from darker roots to lighter ends.
- Brush and Comb Technique: Using a brush and comb allows for precise application where you can paint the dye onto the hair while using a comb to blend it. This technique is particularly useful for those who want a more defined ombre look, as the brush can create sharp lines, and the comb helps to merge the colors seamlessly.
- Balayage Technique: This freehand technique involves painting the dye directly onto the hair without the use of foils or caps. It allows for a more natural and sun-kissed appearance, as you can vary the amount of dye applied and where it’s placed, making it perfect for achieving a soft ombre effect at home.
- Dip-Dye Method: This is the simplest technique where you apply the dye only to the ends of the hair. After sectioning your hair, you dip the ends into the dye for a bold, striking contrast, which is ideal for those who want to try ombre without an extensive application process.
How Does the Balayage Technique Create Stunning Ombre Looks?
As a result of its natural blending, balayage grows out beautifully, reducing the need for regular salon visits and allowing for a more relaxed hair care routine.
Ultimately, the use of balayage can transform ordinary hair into a captivating masterpiece, offering a beautiful interplay of light and shadow that elevates any look.
What Are the Key Steps for Achieving Traditional Ombre?
The key steps for achieving traditional ombre involve a careful process of preparation, application, and finishing touches.
- Choose the Right Hair Color: Selecting the best base hair color is essential for a successful ombre. The ombre effect typically involves a gradual transition from a darker shade to a lighter one, so consider colors that complement each other, such as dark brown fading into caramel or blonde.
- Prepare Your Hair: Before starting the dyeing process, ensure your hair is clean and dry. This preparation can involve washing your hair a day before to allow your natural oils to protect your scalp during the dyeing process, and it’s also advisable to avoid using heavy products that could affect color absorption.
- Section Your Hair: Divide your hair into sections to create a more manageable dyeing process. Typically, you should part the hair into four sections: two at the front and two at the back, securing each section with clips to keep them out of the way while you work on the ombre application.
- Apply the Lightener: Using a brush, apply the lightener or dye to the ends of your hair, gradually working up towards the mid-lengths. This technique creates a seamless blend, and it’s important to start with a small amount and build up to achieve the desired lightness without creating harsh lines.
- Blend for Smooth Transition: To achieve a natural ombre look, blend the dye upwards using your fingers or a comb. The goal is to create a soft gradient, so take your time to ensure that the color transition is smooth and visually appealing.
- Timing and Rinsing: Follow the manufacturer’s instructions for how long to leave the dye on your hair, usually around 20-40 minutes. After the time has elapsed, rinse your hair thoroughly with cool water to help seal the hair cuticles and prevent color fading.
- Condition Your Hair: After rinsing, use a deep conditioner to restore moisture to your hair. Ombre can be drying due to the lightening process, so applying a nourishing conditioner will help maintain your hair’s health and shine.
- Style and Maintain: Once your hair is dry, style it as desired to showcase your new ombre look. To maintain the vibrancy of your color, use sulfate-free shampoos and conditioners, and consider regular touch-ups to keep the ombre looking fresh and beautiful.
What Supplies Do You Need to Successfully DIY Ombre Hair Color?
To successfully DIY ombre hair color, you’ll need a variety of supplies to ensure the process is smooth and effective.
- Hair Bleach: This is essential for lightening the lower sections of your hair to achieve the ombre effect. Choose a quality bleach product that allows for controlled lightening and follow the instructions carefully to avoid damage.
- Developer: A developer is used in conjunction with bleach to activate it. The volume of developer you choose (typically 20 or 30 volume) will determine how light your hair will become, so select one based on your current hair color and desired outcome.
- Hair Dye: After bleaching, you’ll need a semi-permanent or permanent hair dye to add color to the lighter sections. Select a shade that complements your natural color and the overall look you want to achieve.
- Mixing Bowl and Brush: These tools are crucial for combining the bleach and developer and for applying the product to your hair. A bowl allows for easy mixing and a brush helps with precise application to ensure even coverage.
- Gloves: Protect your hands from chemical burns and staining by wearing disposable gloves during the dyeing process. This is particularly important when working with bleach, which can be harsh on the skin.
- Hair Clips: Use clips to section your hair for easier application. This ensures that you can work methodically and achieve an even ombre effect without missing any areas.
- Towel: A towel is helpful to protect your clothing and to manage any drips during the application process. Choose an old towel that you don’t mind staining, as hair dye can be difficult to remove.
- Shampoo and Conditioner: It’s best to have a sulfate-free shampoo and a deep conditioner ready for after you dye your hair. These products will help maintain the health of your hair and prolong the vibrancy of your new ombre color.
How Can You Prepare Your Hair for the Best DIY Ombre Results?
To achieve the best DIY ombre hair color, it’s important to follow a few essential preparation steps:
- Choose the Right Shade: Selecting a complementary color for your base and ombre shade is crucial. Consider your skin tone and natural hair color; lighter shades work well for those with fair skin, while darker shades can enhance warmth in olive or darker skin tones.
- Gather Necessary Supplies: Ensure you have all the tools and products you’ll need before starting. This includes hair dye, a mixing bowl, applicator brush, gloves, foil or plastic wrap, and a comb, as having everything ready will streamline the process and minimize mess.
- Perform a Strand Test: Before applying dye to your entire head, do a strand test to see how your hair reacts to the dye. This will help you assess the final color and ensure you won’t have any adverse reactions, allowing you to adjust the application time according to your hair’s texture and porosity.
- Prepare Your Hair: Wash your hair with a clarifying shampoo to remove any product buildup, but avoid conditioning beforehand. This ensures the hair cuticles are open and can absorb the dye better, leading to a more vibrant ombre result.
- Section Your Hair: Divide your hair into manageable sections using clips. This allows for a more precise application of dye, ensuring that the ombre effect is blended evenly and looks natural throughout your hair.
- Protect Your Skin and Clothes: Apply petroleum jelly around your hairline and wear old clothes. This will prevent any unwanted staining on your skin or garments, keeping your DIY session neat and tidy.
What Steps Should You Follow for Perfect Application of Ombre Hair Color?
To achieve the best DIY ombre hair color, follow these essential steps:
- Choose Your Color: Select the shades for your ombre that complement your natural hair color and skin tone. Typically, an ombre effect transitions from a darker shade at the roots to a lighter shade at the tips, which can enhance your features.
- Gather Your Supplies: Collect all necessary materials such as hair dye, a mixing bowl, application brush, gloves, and a comb. Having everything ready will help streamline the process and ensure you don’t miss any important steps.
- Prepare Your Hair: Start with clean, dry hair that hasn’t been washed for at least 24 hours, as natural oils help protect your scalp. Consider applying a deep conditioner a day or two prior to dyeing to keep your hair healthy and hydrated.
- Section Your Hair: Divide your hair into manageable sections using hair clips, typically into four or more sections, so you can apply the dye evenly. This organization helps ensure that no strands are missed and makes it easier to control the application process.
- Mix the Dye: Follow the instructions on your dye kit to mix the color properly. Ensure you wear gloves to protect your hands from staining, and mix until the color is uniform without lumps.
- Apply the Dye: Starting from the tips, apply the lighter shade first, working your way up towards the roots, blending as you go. Use the application brush to create a seamless gradient effect, ensuring that the dye is evenly distributed without harsh lines.
- Blend the Colors: If using multiple shades, carefully blend the transition area where the colors meet, using your fingers or a comb to create a natural fade. This step is crucial for a smooth ombre look that doesn’t appear stark or artificial.
- Set the Timer: Follow the dye instructions for how long to leave the color on, usually between 20-40 minutes. Keep an eye on the time to avoid over-processing, which can damage your hair.
- Rinse and Condition: Once the time is up, rinse your hair thoroughly with cool water until the water runs clear. Apply a deep conditioner to nourish your hair after the dyeing process, which helps maintain shine and moisture.
- Style as Desired: After rinsing and conditioning, style your hair as you normally would, allowing it to air dry or using a blow dryer. This will help you see the final result and make any adjustments if necessary.
What Aftercare Tips Are Essential to Maintain Your DIY Ombre Look?
To maintain your DIY ombre look, it is essential to follow specific aftercare tips that will keep your hair vibrant and healthy.
- Use Sulfate-Free Shampoo: A sulfate-free shampoo helps preserve the color of your hair by preventing the stripping of natural oils and pigments. Traditional shampoos often contain harsh detergents that can fade your ombre color quickly.
- Deep Conditioning Treatments: Regular deep conditioning treatments are crucial for keeping your hair moisturized and preventing dryness, which can occur after dyeing. This will not only help maintain the vibrancy of your ombre color but also keep your hair soft and manageable.
- Limit Heat Styling: Reducing the use of heat styling tools can prevent further damage to your dyed hair. Excessive heat can lead to dryness and split ends, causing your ombre look to look dull and lifeless.
- Protect from Sun Exposure: UV rays can fade hair color, so it’s important to protect your ombre from sun exposure. Wearing a hat or using hair products with UV protection can help maintain the color’s richness and prevent damage.
- Regular Trims: Keeping your hair trimmed helps remove any split ends and keeps your ombre looking fresh. Regular trims also help maintain the overall health of your hair, which is essential for a polished appearance.
- Avoid Chlorine: Chlorine from swimming pools can react with hair dye and lead to undesirable color changes. If you swim, consider wearing a swim cap or rinsing your hair with clean water before entering the pool.
- Color Depositing Products: Using color depositing conditioners or masks can help refresh your ombre color between dye jobs. These products add subtle tones to your hair without the commitment of full-color treatment.
What Common Mistakes Should You Avoid When Trying DIY Ombre Hair Color?
When attempting DIY ombre hair color, it’s important to be aware of common mistakes that can lead to unsatisfactory results.
- Skipping a Strand Test: Always perform a strand test before applying any color to your entire head. This allows you to see how the hair reacts to the dye and ensures that the final color meets your expectations.
- Not Using the Right Tools: Proper tools such as brushes, bowls, and gloves are essential for an even application. Using the wrong tools can lead to uneven color distribution and a messy application process.
- Neglecting to Pre-Lighten Dark Hair: If you have dark hair and want to achieve a lighter ombre effect, you may need to pre-lighten your hair before applying the dye. Failing to do so can result in a color that doesn’t show up or appears muted.
- Applying Color Too Quickly: Rushing through the application process can lead to patchy results. Take your time to ensure that each section of hair is evenly coated and blended for a seamless ombre look.
- Choosing the Wrong Shade: Selecting a color that doesn’t complement your skin tone can result in an unflattering appearance. It’s essential to consider your natural undertones and choose shades that enhance your overall look.
- Overlapping Color on Previously Dyed Hair: If your hair has been previously dyed, applying new color over old can lead to damage and unwanted results. Always avoid overlapping color to maintain the integrity of your hair.
- Ignoring Aftercare: Proper aftercare is critical for maintaining the vibrancy of your ombre. Using sulfate-free shampoos and deep conditioning treatments can help preserve the color and keep your hair healthy.